How to Dry Fresh Flowers for Long-Lasting Beauty
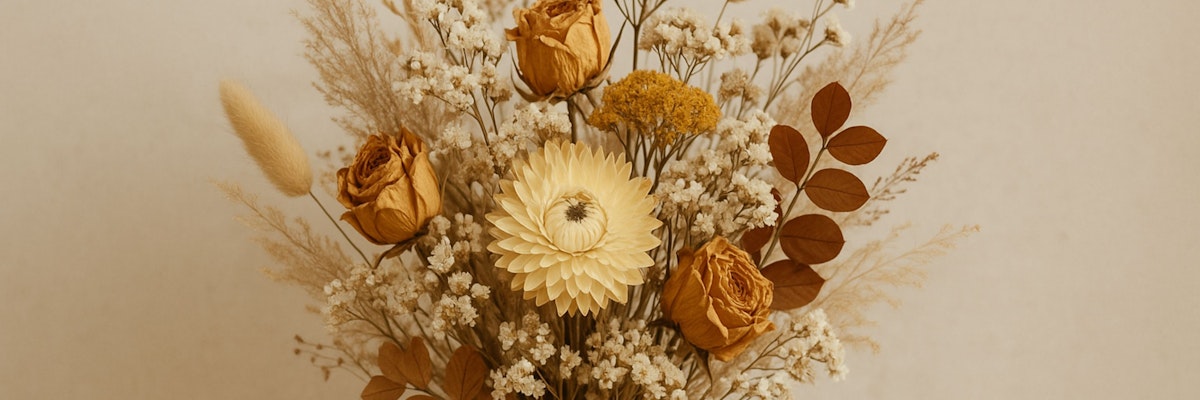
Fresh flowers bring vibrancy and fragrance into a home, but their beauty often fades too quickly. If you've ever wished you could keep that bouquet pristine forever, you're not alone.
How to Dry Fresh Flowers for Long-Lasting Beauty
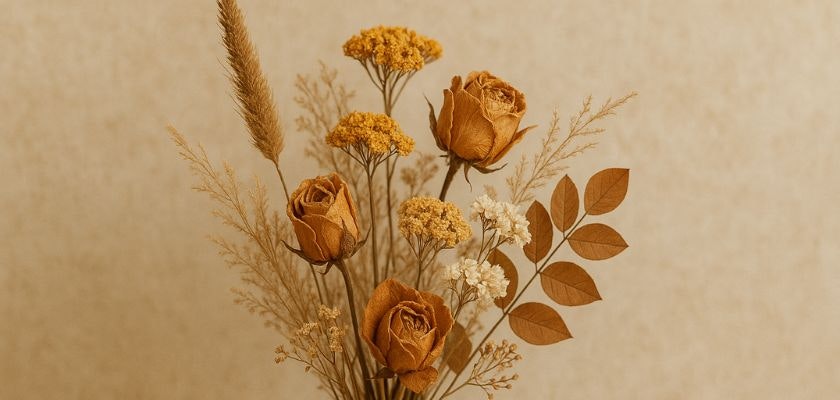
Drying flowers is a way to preserve their beauty, creating timeless mementos. Whether it’s a wedding bouquet, a gift from a loved one, or your own garden blooms, dried flowers can prolong special memories.
Many people think dried flowers lose their charm, but with proper techniques, their allure can remain intact. Drying flowers is not just about preserving; it enhances their versatility. Once dried, flowers can be used in chic home décor, thoughtful gifts, and even creative crafts.
Beyond personal keepsakes, dried flowers are gaining popularity for their eco-friendliness. Instead of discarding withered blooms, drying gives flowers a second life. This sustainable trend helps reduce waste while adding beauty to spaces.
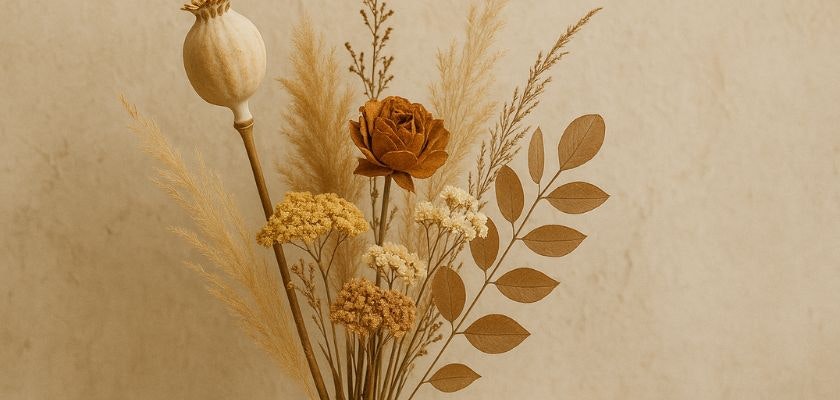
Understanding flower types is key to successful drying. Some flowers, like roses and lavender, dry exceptionally well and maintain their texture. Others may require extra care to retain their natural color. Choosing the right method ensures quality results.
Additionally, the art of drying flowers isn’t limited to experts. Whether you’re a beginner or a seasoned DIY enthusiast, you can master techniques like air drying, microwave drying, or using silica gel. Each method has unique benefits and works for different flowers.
This blog will guide you through proven methods to dry flowers effectively. From preparation to execution, these steps will help you achieve stunning results. You’ll also learn how to preserve color and structure, elevating your dried floral projects.
If you're a fan of crafting, dried flowers open a world of creativity. Incorporating dried blooms in wreaths, arrangements, and pressed art unlocks limitless possibilities. By the end of this read, you'll be equipped to start drying flowers at home, creating lasting art and memories alike.
Choosing the Right Flowers to Dry
The success of any flower drying project begins with selection. Not all blooms are created equal, and some lend themselves better to the drying process than others. Understanding which flowers to choose sets the foundation for long-lasting results.
Flowers with low moisture content generally dry better. Popular choices include roses, lavender, baby's breath, and hydrangeas. Their structure remains intact during drying, making them ideal for preserved arrangements. Blooms with higher water content, such as lilies, may require more effort to prevent wilting.
Timing plays a crucial role. To achieve vibrant dried flowers, always pick blooms at their peak. Flowers that are fully open might lose petals during drying, whereas buds may not showcase their full potential. A little foresight ensures the blossoms retain their charm.
Inspecting flowers before drying is vital. Look for any signs of damage, pests, or imperfections. Flaws in fresh flowers magnify after drying, so starting with the best specimens leads to better final results. Trim stems and remove excess foliage for cleaner designs.
Consider the purpose of your dried flowers to refine your selection. If you're creating a centerpiece, structural flowers with bold shapes work best. For potpourri or sachets, select flowers with strong fragrances like lavender and roses. Align choices with your project goals.
Another factor is color. Vibrantly hued flowers are more likely to retain an appealing look after drying. While some fading is inevitable, starting with vivid shades ensures your dried floral crafts stay visually appealing over time.
Different methods suit different flowers. Understanding your preferred drying technique can help guide your selection. For example, silica gel drying is perfect for delicate flowers, while air drying suits hardy, structured blooms. Pairing flowers with methods maximizes their beauty.
Finally, seasonal availability might influence your picks. Fresh flowers are more accessible in spring and summer, but working with what's in season often provides top-quality candidates for drying, as nature delivers its best during these periods.
How to Dry Fresh Flowers for Long-Lasting Beauty
Drying flowers is a way to preserve their beauty, creating timeless mementos. Whether it’s a wedding bouquet, a gift from a loved one, or your own garden blooms, dried flowers can prolong special memories.
Many people think dried flowers lose their charm, but with proper techniques, their allure can remain intact. Drying flowers is not just about preserving; it enhances their versatility. Once dried, flowers can be used in chic home décor, thoughtful gifts, and even creative crafts.
Beyond personal keepsakes, dried flowers are gaining popularity for their eco-friendliness. Instead of discarding withered blooms, drying gives flowers a second life. This sustainable trend helps reduce waste while adding beauty to spaces.
Understanding flower types is key to successful drying. Some flowers, like roses and lavender, dry exceptionally well and maintain their texture. Others may require extra care to retain their natural color. Choosing the right method ensures quality results.
Additionally, the art of drying flowers isn’t limited to experts. Whether you’re a beginner or a seasoned DIY enthusiast, you can master techniques like air drying, microwave drying, or using silica gel. Each method has unique benefits and works for different flowers.
This blog will guide you through proven methods to dry flowers effectively. From preparation to execution, these steps will help you achieve stunning results. You’ll also learn how to preserve color and structure, elevating your dried floral projects.
If you're a fan of crafting, dried flowers open a world of creativity. Incorporating dried blooms in wreaths, arrangements, and pressed art unlocks limitless possibilities. By the end of this read, you'll be equipped to start drying flowers at home, creating lasting art and memories alike.
Choosing the Right Flowers to Dry
The success of any flower drying project begins with selection. Not all blooms are created equal, and some lend themselves better to the drying process than others. Understanding which flowers to choose sets the foundation for long-lasting results.
Flowers with low moisture content generally dry better. Popular choices include roses, lavender, baby's breath, and hydrangeas. Their structure remains intact during drying, making them ideal for preserved arrangements. Blooms with higher water content, such as lilies, may require more effort to prevent wilting.
Timing plays a crucial role. To achieve vibrant dried flowers, always pick blooms at their peak. Flowers that are fully open might lose petals during drying, whereas buds may not showcase their full potential. A little foresight ensures the blossoms retain their charm.
Inspecting flowers before drying is vital. Look for any signs of damage, pests, or imperfections. Flaws in fresh flowers magnify after drying, so starting with the best specimens leads to better final results. Trim stems and remove excess foliage for cleaner designs.
Consider the purpose of your dried flowers to refine your selection. If you're creating a centerpiece, structural flowers with bold shapes work best. For potpourri or sachets, select flowers with strong fragrances like lavender and roses. Align choices with your project goals.
Another factor is color. Vibrantly hued flowers are more likely to retain an appealing look after drying. While some fading is inevitable, starting with vivid shades ensures your dried floral crafts stay visually appealing over time.
Different methods suit different flowers. Understanding your preferred drying technique can help guide your selection. For example, silica gel drying is perfect for delicate flowers, while air drying suits hardy, structured blooms. Pairing flowers with methods maximizes their beauty.
Finally, seasonal availability might influence your picks. Fresh flowers are more accessible in spring and summer, but working with what's in season often provides top-quality candidates for drying, as nature delivers its best during these periods.

Preparing Flowers for Drying Success
Preparation is just as important as the drying method itself. Properly prepping your flowers ensures they maintain their color, structure, and longevity. Skipping this step can lead to uneven results that diminish your project’s appeal.
Start by trimming flower stems to the desired length. While you can always cut them later, longer stems offer greater flexibility for future arrangements. Using sharp scissors or pruning shears avoids unnecessary stress on the stems, keeping them intact for drying.
Remove excess leaves and foliage from the flowers. Leaves tend to spoil faster than petals, so stripping them ensures the drying process focuses on preserving the bloom. Plus, clean stems make arrangements more polished and professional.
Inspect each flower for imperfections. Damaged or browning petals should be gently removed to prevent them from affecting the rest of the flower. One bad petal can devalue an entire bloom, so be meticulous in your efforts.
Clean the flowers if needed. Some blooms might have traces of dirt or particles, particularly if they’re freshly picked. A soft damp cloth can be used to wipe them gently. Allow them to dry completely before starting the preservation process.
Moisture in flowers can cause problems when drying. Ultra-fresh blooms work best. If some flowers are slightly hydrated, allow them to rest in a dry, well-ventilated space for a few hours prior to the actual drying. This avoids molding during preservation.
Grouping flowers before drying lays the groundwork for organization. For instance, bundling similar flowers together saves time and ensures consistent results. When combining, group flowers by species for uniform drying.
Setting flowers up for drying may also require extra support. Delicate blooms often need reinforcement to maintain their structure throughout the drying process. This could involve special pins, drying hangers, or silicone pads, depending on the technique you're using.
Air Drying Flowers to Perfection
Air drying is one of the most traditional and budget-friendly methods for preserving flowers. Ideal for hardy blooms, this method requires minimal tools and delivers stunning results when done correctly. Here's how to get the most out of air drying your flowers.
To start, select flowers with sturdy stems and good structural integrity. Roses, lavender, and baby’s breath are excellent choices. Prepare your flowers by trimming the stems to your preferred length and removing excess foliage. This ensures the drying process focuses on preserving the blooms themselves.
Tie the stems together in small bundles using string or rubber bands. Bundling flowers ensures they stay organized and allows for optimal airflow. Be mindful not to overcrowd each bundle, as this can slow the drying process and lead to uneven results.
Find a dark, dry, and well-ventilated space for hanging your flowers. Exposure to direct sunlight can cause colors to fade, so choose an area like a closet, attic, or shaded basement. Drying in darkness helps maintain the vibrancy of the flowers' natural hues.
Hang the flower bundles upside down from hooks or a clothesline. Hanging the stems ensures gravity helps the flowers maintain their shape and prevents drooping. Give each bundle enough space to avoid contact, which could lead to flattening or mold growth.
Patience is crucial when air drying flowers. Most blooms take about two to three weeks to dry completely. Resist the urge to rush the process by increasing airflow with fans, as this can lead to brittle petals or inconsistent results.
Once dried, test the flowers for readiness by gently touching the petals. They should feel crisp and papery, indicating all moisture has been removed. Carefully remove the flowers from their hanging position and inspect for any remaining soft spots.
Air-dried flowers can be used in a variety of crafts, from floral arrangements to wreaths and even framed art. They also add a rustic charm to home décor while retaining the essence of their original beauty. Store any unused dried flowers in a cool, dry place to prevent deterioration.


Preserving Flowers with Silica Gel
Silica gel is a game-changer for preserving flowers with intricate shapes and vibrant colors. This method works exceptionally well for delicate blooms like dahlias, peonies, and roses. While it requires special materials, it produces professional-quality dried flowers.
Silica gel is a porous, sand-like substance that absorbs moisture from flowers. Purchase it from craft stores or online suppliers. It’s reusable and an excellent investment for anyone interested in dried floral crafts. Make sure to use the non-toxic variety if you’re new to this method.
Begin by choosing flowers in peak condition, as silica gel captures them exactly as they are. Trim the stems and select flowers with intact petals and consistent coloring. This method works best for individual flowers rather than bouquets.
To preserve flowers, fill a sealable container with a layer of silica gel. Gently place the flowers on top, ensuring their petals are supported. Cover the flowers entirely with more silica gel, being careful to avoid crushing their delicate structures.
Seal the container tightly and leave it in a cool, dry place for several days. The exact drying time depends on the flower type but typically ranges from three to seven days. Checking the flowers too soon can disrupt the process, so patience is key.
Once dried, gently brush off excess silica gel with a soft brush or your fingers. Take care not to damage the flowers, as they can become brittle. Their vivid colors and detailed shapes will look almost identical to their fresh state.
Silica gel is perfect for preserving flowers you want to display as keepsakes. For example, wedding bouquets or special occasion arrangements can be preserved as cherished memories. Display them in shadow boxes or glass domes to showcase their beauty.
When storing unused silica gel, keep it in an airtight container to maintain its efficacy. Over time, silica gel can be reactivated by heating it in the oven, ensuring your flower preservation toolkit remains ready for future projects.
Using a Microwave for Quick Drying
For those short on time, microwave drying is a fast and effective method to dry flowers. Unlike traditional air drying, this technique allows you to preserve flowers in minutes while still capturing their vibrant colors and intricate details.
To begin, select flowers with robust petals and good structure. Roses, daisies, and marigolds are excellent candidates. Microwaves work by quickly evaporating moisture, so flowers with high water content might not hold their shape as well.
You'll need a microwave-safe container, silica gel, and access to a microwave. Place a small layer of silica gel at the bottom of the container, then arrange your flowers on top. Cover them completely with more silica gel, ensuring all petals are evenly supported.
Set the microwave to a low heat setting and insert the container. Heating time will vary based on the flower type and microwave wattage but generally ranges from 30 seconds to two minutes. Monitor the process carefully to avoid overheating or damage.
After microwaving, allow the container to cool completely before opening it. Sudden temperature changes can make flowers brittle. Once cooled, gently brush away excess silica gel and inspect the flowers for dryness and structural integrity.
Microwave drying is ideal for urgent projects or last-minute gifts. The quick turnaround means you can incorporate dried flowers into crafts or arrangements almost immediately, making it perfect for spur-of-the-moment creativity.
Despite the speed, microwave drying does have limitations. It works best for small batches and requires close attention to detail. Over-microwaving can darken petals or make flowers fragile, so always test the process with one or two flowers first.
Display your microwave-dried flowers in clear vases, or use them as embellishments for greeting cards, candles, or jewelry. Their preserved vibrancy and quick preparation make them versatile for any craft project.
This method combines speed and beauty, ensuring even the busiest individuals can enjoy the art of dried floral crafts. It’s a testament to how technology can enhance traditional preservation techniques.
Pressing Flowers for Timeless Art Pieces
Pressing flowers is an artful way to dry flowers while retaining their delicate beauty. This method has been cherished for centuries, allowing nature lovers to preserve blossoms for artistic and sentimental projects. Here's how you can get started with this elegant technique.
Begin by selecting flowers with flatter shapes, as they press more evenly. Flowers like pansies, daisies, and violets are excellent choices, while fuller blooms like roses can be split into thinner layers for optimal results. Always go for fresh blossoms, as wilted flowers won’t press well.
To press flowers, you’ll need blotting paper or paper towels, a heavy book, and additional weight, such as a stack of books. Arrange the flowers on the blotting paper with their petals spread out. Carefully cover them with another sheet of blotting paper to protect the pages of your book.
Place the layered flowers in the middle of the book, then close the book carefully. Add the weights on top to ensure the pages stay securely pressed. Position the book in a warm, dry environment to prevent moisture from interfering with the process.
It’s important to change the blotting paper every few days to absorb any leftover moisture. This prevents mold or discoloration. Depending on the type of flower and environmental conditions, the pressing process usually takes one to two weeks to complete.
When ready, gently remove the pressed flowers, which should now feel papery and almost weightless. Use tweezers to handle them, as they can be fragile. Their flat, preserved appearance makes them perfect for framed art, bookmarks, or greeting cards.
Pressed flowers are versatile for crafts and design. Incorporate them into phone case decorations, candle-making, or even resin projects for trendy accessories. Their delicate charm adds a touch of nature to any creative endeavor, making them timeless keepsakes.
By taking precautions and giving adequate drying time, pressing flowers ensures minimal color fading and retains their intricate details. Consider experimenting with flower arrangements before pressing to form harmonious layouts for your creations.
Whether you’re preserving flowers from a memorable event or creating classic art pieces, pressing flowers is a rewarding technique that celebrates nature. Each preserved bloom tells its own story, embodying treasured moments in a lasting and beautiful way.
Crafting Potpourri with Dried Blooms
Transforming dried flowers into potpourri is a fragrant and creative way to give new life to your blooms. This process pairs visual beauty with delightful scents, making it a popular choice for home décor and gifts. Follow these steps to craft your own aromatic potpourri.
When selecting flowers for potpourri, prioritize blooms known for their fragrance, such as lavender, roses, or chamomile. Adding complementary elements like dried citrus peels, herbs, and spices enhances both the scent and appearance of your potpourri.
Begin by drying your chosen flowers using air drying or silica gel. The goal is to create petals and buds that are dry but still retain their natural colors and shapes. Mixing different flowers and accents creates visual interest and a layered fragrance profile.
To achieve lasting fragrance, include fixatives like orris root or oakmoss in your potpourri mix. Fixatives help sustain the scent by slowing down the evaporation of essential oils. You can find these materials at specialty craft or apothecary shops.
Enhance the scent with your favorite essential oils. Choose oils that complement your flowers, such as lavender oil with dried lavender or rose oil with dried rose petals. Gently stir the potpourri mix to distribute the oils evenly, ensuring you don’t oversaturate the petals.
Store your potpourri in an airtight container for a few weeks to allow the fragrances to meld and intensify. This resting period ensures a full-bodied scent that will delight anyone who encounters it. Afterward, place small amounts of potpourri in decorative bowls or sachets.
Potpourri sachets are particularly versatile and can be used in drawers, closets, or even as car fresheners. You can sew fabric pouches to match your décor, making them both practical and aesthetically pleasing.
For collectors, potpourri offers the chance to preserve flowers long-term while creating sensory experiences. Mixing seasonal blooms, like dried peonies for spring or cinnamon sticks for autumn, adds a seasonal touch that changes with the year.
Potpourri isn’t just functional; it’s an art form that ties together fragrance, texture, and color. By customizing your mix to your tastes, you bring warmth and character to your home while enjoying the therapeutic benefits of natural scents.


Modern Trends in Dried Floral Arrangements
Dried flowers have made a significant comeback in the world of floral design. Once considered old-fashioned, they are now a trendy choice for home décor and special events. Their vintage charm and eco-friendly nature make them a favorite among modern flower enthusiasts.
One popular trend is mixing dried flowers with fresh ones. This hybrid approach creates a contrast between vibrant fresh blooms and the textured appeal of dried elements. Adding dried lavender to a fresh rose arrangement, for instance, enhances both fragrance and visual interest.
Arrangements that highlight earthy tones and muted colors are also highly sought after. Bouquets featuring pampas grass, bunny tails, and dried eucalyptus exude a neutral and calming vibe. These arrangements are especially fitting for minimalist or boho-themed spaces.
Event planners often use dried flowers for weddings and celebrations. Bouquets featuring preserved flowers not only last throughout the event but serve as keepsakes for years to come. Brides love using dried flowers to capture the essence of their special day in a timeless way.
Another trend is the use of fully dried ornamentals as statement pieces in homes. Oversized wreaths, hanging arrangements, and wall art made entirely of dried flowers add personality to any room. These pieces combine nature and art in a way that’s both sustainable and beautiful.
Color-treated dried flowers are gaining popularity among those who want bold, eye-catching designs. By dyeing flowers in vibrant shades like electric blue or ruby red, designers can create standout arrangements that break away from traditional natural tones.
The rise of DIY floral kits has made it easier for people to experiment with dried arrangements. Companies like BloomsyBox offer a variety of fresh flowers perfect for drying, empowering flower enthusiasts to create their own floral masterpieces at home.
Social media platforms, especially Instagram and Pinterest, have played a significant role in spreading dried floral trends. Influencers and designers showcase creative ideas, from modern table settings to intricate hanging installations, inspiring thousands to adopt these styles.
Modern dried floral arrangements demonstrate that preserved blooms are far from outdated. They’re a practical, long-lasting option that blends creativity with sustainability. Whether you’re decorating a home or planning a major event, dried flowers offer endless possibilities to infuse beauty into your surroundings.
Creating Everlasting Bouquets
Everlasting bouquets made from dried flowers are a stunning way to preserve the beauty of nature indefinitely. These timeless arrangements stand out for their durability, aesthetic appeal, and versatility in both formal and informal settings.
The first step in creating an everlasting bouquet is choosing a theme. Consider the occasion, color palette, and desired mood. For instance, a romantic arrangement might feature dried roses and baby’s breath, while a rustic design could include golden wheat and lavender.
Mixing textures is key to achieving a balanced bouquet. Combine soft, delicate elements like preserved hydrangeas with structured pieces such as dried thistles. This variety creates visual interest that draws the eye and adds complexity to the arrangement.
Arranging an everlasting bouquet requires a sturdy frame. Use floral wire or foam to anchor the stems, ensuring the bouquet retains its shape over time. Unlike fresh flowers, dried flowers are more brittle, so handle them with care during the assembly process.
For a cohesive look, start with a centerpiece flower to build the bouquet around. Fill in the gaps with smaller blooms and greenery. Pampas grass, eucalyptus, and fern fronds make excellent fillers that add volume without overpowering the design.
To avoid monotony, vary the heights and positioning of the flowers within the bouquet. This technique adds movement and dimension, resulting in a more natural and dynamic arrangement. Feel free to experiment with asymmetry for a modern aesthetic.
When your bouquet is complete, consider sealing it with a light spray of hairspray or floral sealant. This step helps minimize shedding and protects the arrangement from dust. Place the finished bouquet in a location away from direct sunlight to preserve its color as long as possible.
Everlasting bouquets are more than just decorative pieces; they hold sentimental value. Whether it’s a bride’s wedding bouquet or a gift to commemorate a special moment, these preserved arrangements evoke memories and emotions for years to come.
The charm of everlasting bouquets lies in their enduring beauty. They capture the essence of fresh flowers while offering the practicality of long-term enjoyment. By crafting your own dried floral arrangements, you can create meaningful keepsakes that blend artistry with personal significance.

Exploring the Benefits of Dried Floral Crafts
Dried floral crafts go beyond decoration; they provide a creative outlet with therapeutic benefits. Engaging in these crafts allows individuals to connect with nature, express themselves artistically, and enjoy the satisfaction of creating something lasting and beautiful.
One significant benefit of working with dried flowers is sustainability. Instead of discarding fresh blooms after they wilt, drying them extends their lifecycle. This eco-friendly approach minimizes waste and encourages a more mindful way of appreciating natural beauty.
Crafting with dried flowers can also be an affordable hobby. Once you’ve mastered drying techniques, you’ll have a constant supply of materials at little to no cost. Gardeners can easily grow and dry their own flowers, while others can collect blooms from local florists like BloomsyBox.
DIY dried floral crafts also make wonderful gifts. Handmade items, such as wreaths, framed pressed flowers, or potpourri sachets, carry a personal touch that store-bought gifts often lack. Recipients appreciate the thought and effort that go into each creation.
Engaging in floral crafts can be a meditative experience. Arranging flowers, whether for a bouquet or a wall hanging, requires focus and creativity. The process offers a break from daily stresses, promoting relaxation and mindfulness.
Finished dried flower crafts bring a sense of accomplishment. Displaying your work in your home not only enhances the space but serves as a reminder of your creativity. Each piece is a unique reflection of your vision and talent.
For those interested in entrepreneurship, dried floral crafts present a business opportunity. With the growing demand for eco-friendly and handmade products, selling dried flower arrangements can be a rewarding venture. Platforms like Instagram and Etsy are excellent outlets for showcasing and selling creations.
The range of projects you can explore with dried flowers is virtually endless. From home décor to wearable art, these crafts provide continual inspiration. With every new project, you learn and refine your skills, elevating your artistry even further.
The beauty of dried floral crafts lies in their accessibility and versatility. Anyone, regardless of experience, can participate and create something meaningful. Whether you’re crafting for personal enjoyment or sharing your work with others, the possibilities are as enduring as the flowers themselves.
Drying fresh flowers is a gratifying way to preserve their beauty and repurpose them for creative projects. Once you’ve mastered the techniques outlined in this post, you’ll have a treasure trove of dried blooms ready to inspire your next venture into dried floral crafts. Whether you're creating everlasting bouquets or enhancing your home décor, dried flowers offer a timeless way to celebrate nature.
If you’re wondering, where can I order flowers for delivery? consider starting with a trusted floral service like BloomsyBox.com. Their wide variety of fresh blooms ensures the perfect selection for drying and crafting. For convenience, click here to explore their stunning options for all flowers.
Preserving and crafting with dried flowers is more than a hobby; it’s a rewarding practice that combines creativity, sustainability, and emotional value. From vibrant arrangements to heartfelt gifts, the possibilities are truly endless. Take your first step into this beautiful art form today, and discover the joy of making nature last forever.